 RV
Awnings
RV
Awnings
RV
Awnings
With a little TLC your RV awning can give you many years of service. Awnings often get taken for granted because they are fairly trouble free. The two main parts of the awning, the hardware and fabric, need some minor care and maintenance.
When I began my career working around RVs in 1963 the only awnings I knew consisted of a piece of canvas 9’ x 12’ with a rope sewn into one side and a grommet on each opposite corner. There were two poles, two ropes (fancy ones had wooden adjusters) and a couple of stakes. The RVs themselves did not come from the factory with an awning rail. An awning rail had to be installed by the dealer. In the late 60’s earlier 70’s roller tube awnings began to be a popular option and were installed by the dealer. In the early 80’s many RV factories began installing awnings with an accessory package the dealer ordered when the RV was ordered. Today it is very seldom an RV arrives on a dealer’s lot without a patio awning. There are still other awnings and toppers often installed by the dealer, such as window awnings and slide room toppers. Diesel pushers sometimes have a door awning over the main door. Many pickup campers have awnings on the side and over the main door.
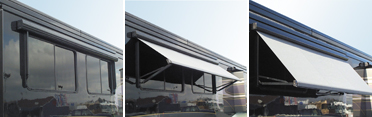
The three awnings above are examples of window awnings.
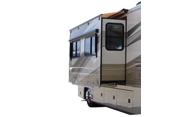
This is an example of a slide awning.
Awnings are a popular option. It seems as though most RV owners have the RV awning care information buried in the owner’s packet and never give it the attention they should. Worse yet some owners are never given the awning information by the dealer or service center. ANYTIME YOU TAKE DELIVERY ON A NEW RV OR HAVE AN ACCESSORY/PART INSTALLED ON YOUR RV INSIST YOU GET ALL PAPERWORK THAT CAME WITH IT. This includes installation instructions, warranty information, user instructions, etc.
Awning instructions have information concerning normal maintenance. Some awning companies explicitly limit the warranty if these instructions are not followed. Maintain your new awning according to these instructions.
A recent innovation for awnings is an electric powered awning that runs on 12VDC. For these to operate properly they must have a good strong 12VDC source. Some are run by a remote control while some operate from a switch inside the RV.
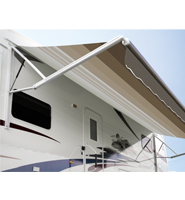
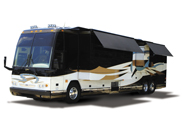
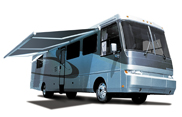
Above is a power awning.
A nice feature is a wind detector that is on the roof of the RV. When the wind speed gets up this wind detector automatically retracts the awning. This feature is an expensive option and most often found on luxury RVs.
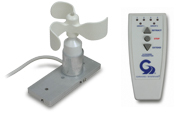
Above is an example of a wind sensor.
Caring for the fabric on your awning and slide-room toppers is important. A few tips on how to do this are:
1. Your awning should be completely dry and clean before closing it. If you must close the awning when it is still wet, open it within 12 hours to let it dry.
2. Clean all twigs, leaves, debris, etc off the top of awning before closing it.
3. Mildew does not form on the fabric itself. It accumulates on the dust, dirt and grime. This is why it is important to keep the fabric clean.
4. Hose fabrics off occasionally with clear water. This will keep dirt from becoming deeply imbedded in the fabric and help eliminate the need for frequent extensive cleanings.
5. Most awning fabrics are either vinyl or acrylic. Acrylic fabrics have the color woven into the fabric. Acrylic is water repellant, NOT waterproof. Air circulates through the fabric so moisture can dry easier. Do not touch the underside of an acrylic awning in the rain or it might leak. There is a slight variation in the best way to clean these. Vinyl fabrics are best cleaned using a soft brush with warm water and soap. Acrylic fabrics are best cleaned using a stiff brush with warm water and soap. The only difference is the stiffness of the brush. Do not use aggressive chemical substances, oil based cleaner or any caustic, granulated, or abrasive type cleaners on either fabric. Many RV dealers sell a special awning cleaner.
6. Air-dry only. Never apply heat or flame to the fabric.
7. Another way to clean the fabric is to use a mixture of ¼ cup of soap and ¼ cup of bleach mixed with 5 gallons of warm water. Liberally apply the mixture on the top of the fabric and close the awning for 5 minutes. This will apply the mixture to the bottom of the fabric also. Open the awning back out and rinse off completely top and bottom with fresh water. Let the awning air-dry thoroughly before closing.
8. Wrinkles may appear in the awning fabric when it is rolled up. This is normal and they will correct themselves when the awning is opened in the hot sun.
9. Opening and closing the awning in cold temperatures could cause the awning fabric to crack.
10. For those few awnings that have zippers keep the zippers clean. Lubricate them only with a lubricant formulated for zippers.
Another area of your awning that needs some TLC is the hardware. The hardware can be described as any moving part that is not fabric. Wipe clean or wash with soap and water. Lubricate all moving parts you can access using an aerosol silicone lubricant spray. WD40 and grease based products are not recommended as they can tend to gather road grime, dirt, dust, etc. Do not forget to clean the inside of the outer awning arms. Lubricant is generally not needed. Use lubricant sparingly and carefully to help prevent it from getting on the fabric.
For those awnings that have a satin or anodized aluminum you can use chrome polish to help with the luster. This would be purely for aesthetic purposes only.
Occasionally inspect for loose bolts and nuts that are accessible and tighten them if needed. Never remove bolts, nuts or rivets when working on an awning if you do not know what the consequences might be. Leave that to the professionals.
Wind, snow and rain can be detrimental to your awning. High winds can damage your awning in many ways. When you are leaving your RV and your awning is out put it in if you have any concerns about storms coming. If you are using your awning in the cold do not let snow accumulate on top as the awning tube and hardware do have weight limits. Don’t use the awning to collect rain. Either close the awning or put it at enough angle the rain will not pocket.
Safety and proper care and use should always be considerations when using an awning.
1. Awning material is flammable. Be careful when using camp stoves or open fires when the awning is extended.
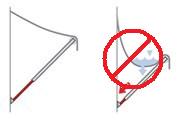
2. The entry door can damage an extended awning. Take precautions to prevent this from happening.
a. Awning rollers
b. Awning should be set up at the correct angle
3. When leaving your RV for an excursion close the awning. Wind and rain storms can come up suddenly.
4. Awning arms and hardware can create pinch hazards. Understand proper operating procedures before operating the awning.
5. Before extending the awning always assure there is plenty of room and the awning won’t hit a tree, pole, etc. This is also true of slide rooms.
6. As an extra safety precaution, visually verify that the awning is fully closed.
7. After each stop do a safety walk around before getting back on the road. Include a glance at all awnings as a part of the safety walk around. Pay particular attention to the position of the safety lever. This is the lever you pull or push with the awning wand before operating the awning.
8. Many awnings have springs in the roller tube which create the torque to wind up the awning. Over time it may become necessary to put more torque
on these springs. This can be a very dangerous process. For safety it is best that this be done by a certified RV technician with proper training and tools.
9. Check the top and bottom bracket mounting screws to make sure they are tight.
There are several options available for awnings. Some of them such as awning rafters, awning de-flapper clips, awning cradle supports and awning rollers are nice options that will help extend the life of your awnings. The awning rafters and awning cradle supports are often recommended by the awning manufacturers when there awning models get to a specified length. Some other options your dealer will be able to help you with are screen rooms, awning mats, and stabilizer kits. Retractable awning wands are also nice. Party lites of all kinds are available and remember they are best use with party lite clips.
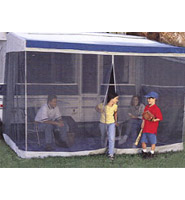
An example of a screen room.
Your dealer or service center will be able to help you with any specific questions you may have regarding awnings. Thank you for reading this article and enjoy your RV.
Gary Motley
2/18/09
Back to Motley RV Repair Home Page Back to Motley RV Repair RV Care/ Use Articles